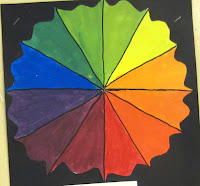
I first did this lesson as a 6th grader myself close to 20 years ago. I believe we did it in math class while talking about different types of symmetry. While there are several art blogs out there that have lovely photos of student work using the same process I'm not finding a tutorial with photos of how to lead your student's through the process so here is one. Be warned this is photo heavy.
First off you want plain old copy paper...nothing fancy you want to be able to see through the paper easily. Cut that copy paper into whatever size square you want. We go for 8 1/2 inches by 8 1/2.
Guide the student's (ideally under a document camera) into folding the paper into fourths and then opening it back flat again. Then have them fold the paper diagonally. Open the paper. Fold it diagonal the other direction.
Have the kids keep the paper folded into this right triangle.
Have them fold it down into a smaller triangle....another right triangle.
And fold it down one more time. It needs to be folded in this order for it to look right when you open it up.
With the paper folded into the smallest right triangle have them set the paper on the table in front of them with the 90 degree angle up.
Then moving left to right have the kids write their name in block or bubble letters.
Make sure they have each letter touch the top and bottom of the triangle. Kids who want a challenge can use fancier lettering or overlapping or add in a random shape or two...but really your standard block letters will do just fine. What is important is that those letters touch the TOP and BOTTOM
Have the kids ink over their pencil lines with sharpie.
Now open up the paper. Have the kids line up in front of you.
YOU fold the paper so that they get the first tracing location correct. This will only take you a few seconds per kid and will save a ton of time in the long run. See the photo for how to make the first fold.
Send the kids to a window to trace in the first space. (two triangles have lettering now)
You can have them go right to sharpie or work in pencil and then later go over the pencil with sharpie. Warn the kids that at this step their project will probably look like a deranged 1st grader made it and they will come tell you they are doing it wrong and need to start over. Tell them they need to push on. Their tracing is going to be backwards, or upside down or both. If after they fill in all 8 spaces it still looks messed up then they can start over again. Very quickly these go from "What the heck," to "that is so cool!".
Have the kids come back and check in with you after the trace the first section. Fold the paper for them as shown in the photo below.
Yes I know you think a 6th, 7th, 8th (whatever) grader should be able to figure out the paper folding on their own but after doing this lesson 9 times I promise folding it for them the first 2 times really helps.
Have them go trace in the 2 triangles on the flip side. (Four triangles have lettering now)
At this point most can figure out how to open the paper and fold it so that they are now ready to trace four of the triangles into the last four empty spaces.
If there is a big space in the middle of the paper have the kids add an interesting radial shape.
Now the kids can choose up to 5 colors. Sometimes I ask them to go with a color family...other times I let them free range. I like to get as many colors for them to choose from as possible. Do a quick review of how to use markers correctly (coloring in the same directions!)
Have them work not one triangle at a time, but one letter at a time. If the letter B is blue on mine then ALL 8 letter B's have to be blue. Work radially around the paper and you will have very few coloring issues.
Round and round they go. If you want these done will give them one to one half days (40-45 min) to receive instruction, plan, fold, trance and sharpie the design. Then I offer about 2 days to color. If they are really taking their time and coloring nicely then it will take a while. I don't allow white space to show unless it is part of a pattern they are creating.
If they are dragging on the coloring past 2 days then I find it helpful to split class into the first half of class for coloring and the second half for working on another concept or lesson. I match this will my color theory unit and I'll post what the aspects of that are in the coming weeks.
When done the student's are responsible for mounting them on construction paper and attaching a project completion card to the back.


