Saturday, July 28, 2012

every cap counts-our bottle cap mural

This spring I got on the bandwagon and had my student's make a bottle cap mural. It was a simultaneously awesome and awful experience.  To say I underestimated how much work it would be to make the mural is to put it mildly. However, I am in love with the end results and so are the kids. However, my principal sadly is not...you can skip to the last paragraph to read about that part if you don't want to read the rest :(
This is how we made our mural and some things I wished I had known/thought of beforehand. I put my "take away" points for each step of the mural process in astricks so you can skim the post if you want.

Creating the base for the mural:
** 1/2 plywood is very affordable and home depot will make two cuts for free for you**
***Block in the colors you are going to use in each section with paint***
The base of the mural is a 4x6 foot sheet of plywood cut in half. I projected a simple coloring sheet of Starry Night onto the plywood and had some kids trace it and then go over the lines in sharpie. Then we blocked in the colors we planed to use with some craft paint ( I put dots of paint in each section and then student's who were done early could go work on blocking in the areas) later this made it so much easier for lots of kids to work on the mural and know what went where.

Collecting the caps:
**Start collecting caps early!**
**Go to local coffee shops and ask them to save milk jug lids for you**
By far the hardest part of this project for us was getting the caps into the classroom. Maybe it is because I work with middle school kids, maybe I didn't advertise the project well enough...all I know is the caps did not come pouring in as I had hopped. Eventually I put a collection bucket in the main office, in the lunch room  and in my classroom. I also put announcements in the student morning bulletin and in the parent newsletter. Putting a note in the parent newsletter helped some but not as much as I was expecting. Eventually I got caps 3 ways. 1 for every 5 caps a kid brought to me they got a Swedish gummy fish or sour patch kid. Yes this is food bribery but it worked. 2 several teachers offered extra credit points for caps...every 3 caps equaled 1 point. After midterm grades went home the caps came pouring in.
3. I went to the 3 Starbucks in the neighborhood with large empty cans from the cafeteria and talked the managers into collecting caps from the milk jugs for a week each. I'm hoping one of the Starbucks will let me put up he mural for a few weeks come fall.
AFTER this project was done a student brought me two paper grocery sacks full of caps and the caps just kept coming once families got used to collecting them. So I think a major lesson here is to start collecting the caps a few months before you plan on doing the mural.

Sorting the caps:
** Soak batches of the caps you receive in dish-washing soap or a little bleach water or something so your mural doesn't start to smell of sour milk and other food**
**Have the kids sort out the colors into sub categories...not just "blue" but the different shades of blue**
***look at both sides of the caps for various color options and to create tints and shades***

Attaching the caps:
**pre-lay out the caps where you want them before letting the kids have at it with the glue gun OR have a few student supervisors**
**You are going to use a LOT of glue sticks***
We went the hot glue gun route and I am waiting to see how many caps have fallen off when we get back to school in a few weeks to decided if they need to  be screwed into the board or not. It is possible that I will write a post in three weeks about how I walked into the classroom and the entire thing fell apart and how upset I am. 
Anyway placement of the caps was a big challenge for us. Putting everything together was a lot like putting a puzzle together. I strongly suggest doing any curved or circle or small detail areas first and then systematically filling in from either top down or left to right or something that helps you get a nice fit for all the caps. Having the base color in paint really helped hid areas where we had gaps in the caps.
I really had to keep an eye on where the kids would glue the caps. They would get excited and start gluing in areas that I had not laid out the caps for first. Eventually I trained a few kids to be "supervisors" and one of them had to be present to oversee the gluing of the caps if I was not available. This was a great job for those chronic early finishers. A few kids started layering smaller caps inside of larger caps and I think it added a really neat look to the mural.

Hanging the mural:
**make sure you have a dedicated place to hang the mural**
I have yet to hang the mural. When it was all done I was thrilled with the results, so where all the staff members who saw it and so were the kids AND the 30 families that stopped by to see it at spring portfolio night, that is the most parents to ever take interest in my program. Want to know the ONE person not excited about the end results? My principal! Yes my principal who was on board for the entire project till the very when when she looked at it and decided she didn't know what "message" it would send to hang it in the hall because it looks a little (and I'm quoting her) "junky."  I am dumbfounded. I think it looks great and sends a message that the school supports art and recycling and creativity and collaborative activities.
Let's look a the mural again....
Ok junkie is not what comes to mind when I see that. I really hope she changes her mind come fall and let's me put it up in the halls. I was really hoping to put it in the library or near the office where lots of student's can see the mural. But for now I only have permission to have it hung up in my room. Even the custodian thinks it's a shame that it has to live in my room. My hope is to find  a store or coffee shop in our neighborhood that wants to display it for a few weeks and help show the principal that people will think it is awesome...not junkie.

So will we do it again? Yes we will. We still have a lot of caps left over from this one and I'm feeling more confident about the process. I think I want to make 2 a school year till we have a whole Gallery! For the next one I am thinking something by Matisse. Even if I have to store them all in my room till this principal retires I think the community art experience is worth it.

Saturday, July 21, 2012

Hidden names painting

The sample for this lesson was left behind in my current classroom by a past teacher...I remember doing something similar in middle school so we can call it a classic and we know classics tend to produce constantly good results.  These are done by 6th grade students. I think 3, 4, 5th could also do it.
So pretty straightforward...would make a good back to school lesson. I work with middle school students so they had "choices" along the way. First they needed to choose if they were doing their first name only or first and last. If their name had less than 5 letters they were required to use their name twice. Next they were asked to choose one shape.  The shape will be repeated 5, 7 or 9 times.

I had the kids start by turning their paper at an angle and writing their name in block or bubble letters as large as they could. At least one letter needed to go off the page. All the letters were to overlap in some place. After the kids had a good rough draft ( and at least half had to start again making their letters even bigger) then they added in their shapes and last name if they were doing that. The last names were done small as seen in the example above. Everything was transferred to white card stock paper.

Shapes could overlap, touch or "float" or go off the page. Next students could choose 3-5 colors for their letters. Everyone had to have a black background. I have tried other background colors and they just don't look as good. Sorry. So then you know the deal...each time you hit a line you need to switch colors. Shapes that touch on a diagonal can be the same color but neighbor shapes can not. I have had as young as 2nd grade successfully grasp that concept.
Sometimes less is more, this three color combo is really striking. She is a repeat student and choose to do analogous colors. Once the letters are painted in then let everything dry really well and then go back and do the black background. There can be some small shapes and spaces with these so I suggest some brush practice first. Great for working brush control. Last I made the kids outline everything in black sharpie, choose a background paper that matched one of the colors we used and had them go staple them up in the hall.
I should have made this student make some of her letters bigger....oh well. The past art teacher had the kids do these on canvas board with acrylic (oh the days when we were not in a recession). We had a 100% success rate on this lesson with students who ranged from no art at all to having taken art all year long.
The make a great looking display for back to school night or spring conferences.
Ok I hate to have to bring this up...but please do not use my photos on your blog... it nice if you link back if you use a lesson idea...I'm not too picky about that, but don't take my photos ok?
Enjoy!

Thursday, July 12, 2012

Pop art shoes and foods


Proof that fifth try is the charm :) This is my fifth time having students do a Lichtenstein inspired pop art painting featuring either shoes or food and these were by far the best results for the largest percentage of students yet.  This year I allowed students to choose either a food or a shoe for their focal image. I have taken to allowing students who have trouble drawing LARGE to draw as big as they can and then enlarge on the photocopier. Students have to use two patterns in the background stripes and or dots or a repeating shape taken from their focal image. I had students test out color schemes before painting and everybody had to outline in black. The kids were quite happy with their work and so was I. 


three cupcakes three different ways 

very cool steak...love this boys work!
not the most technically amazing but so charming

 another great one!
sour patch kids are kind of creepy up close
 and gummy bears are a bit menacing
great color scheme

 one of my favorites ever along with the lemon in the first photo
 hanging in the main office 

 only a few kids choose shoes this year...go figure 

 at the start of the year this student was getting failing art for lack of participation and now his work is looking great and he is really proud of himself and I'm proud of him also. I tell my students at the start of each year, each quarter, each lesson, basically each day, that it is not how good of an artist they are that gets their grade and earns my respect, but how much they are willing to improve their skills wherever they are at. 


Tuesday, June 26, 2012

min woven basket: part two


AHAH! I have now mastered (sort of) Picassa and the new blogger formatting so I can finish this post and show other work we did this school year. 

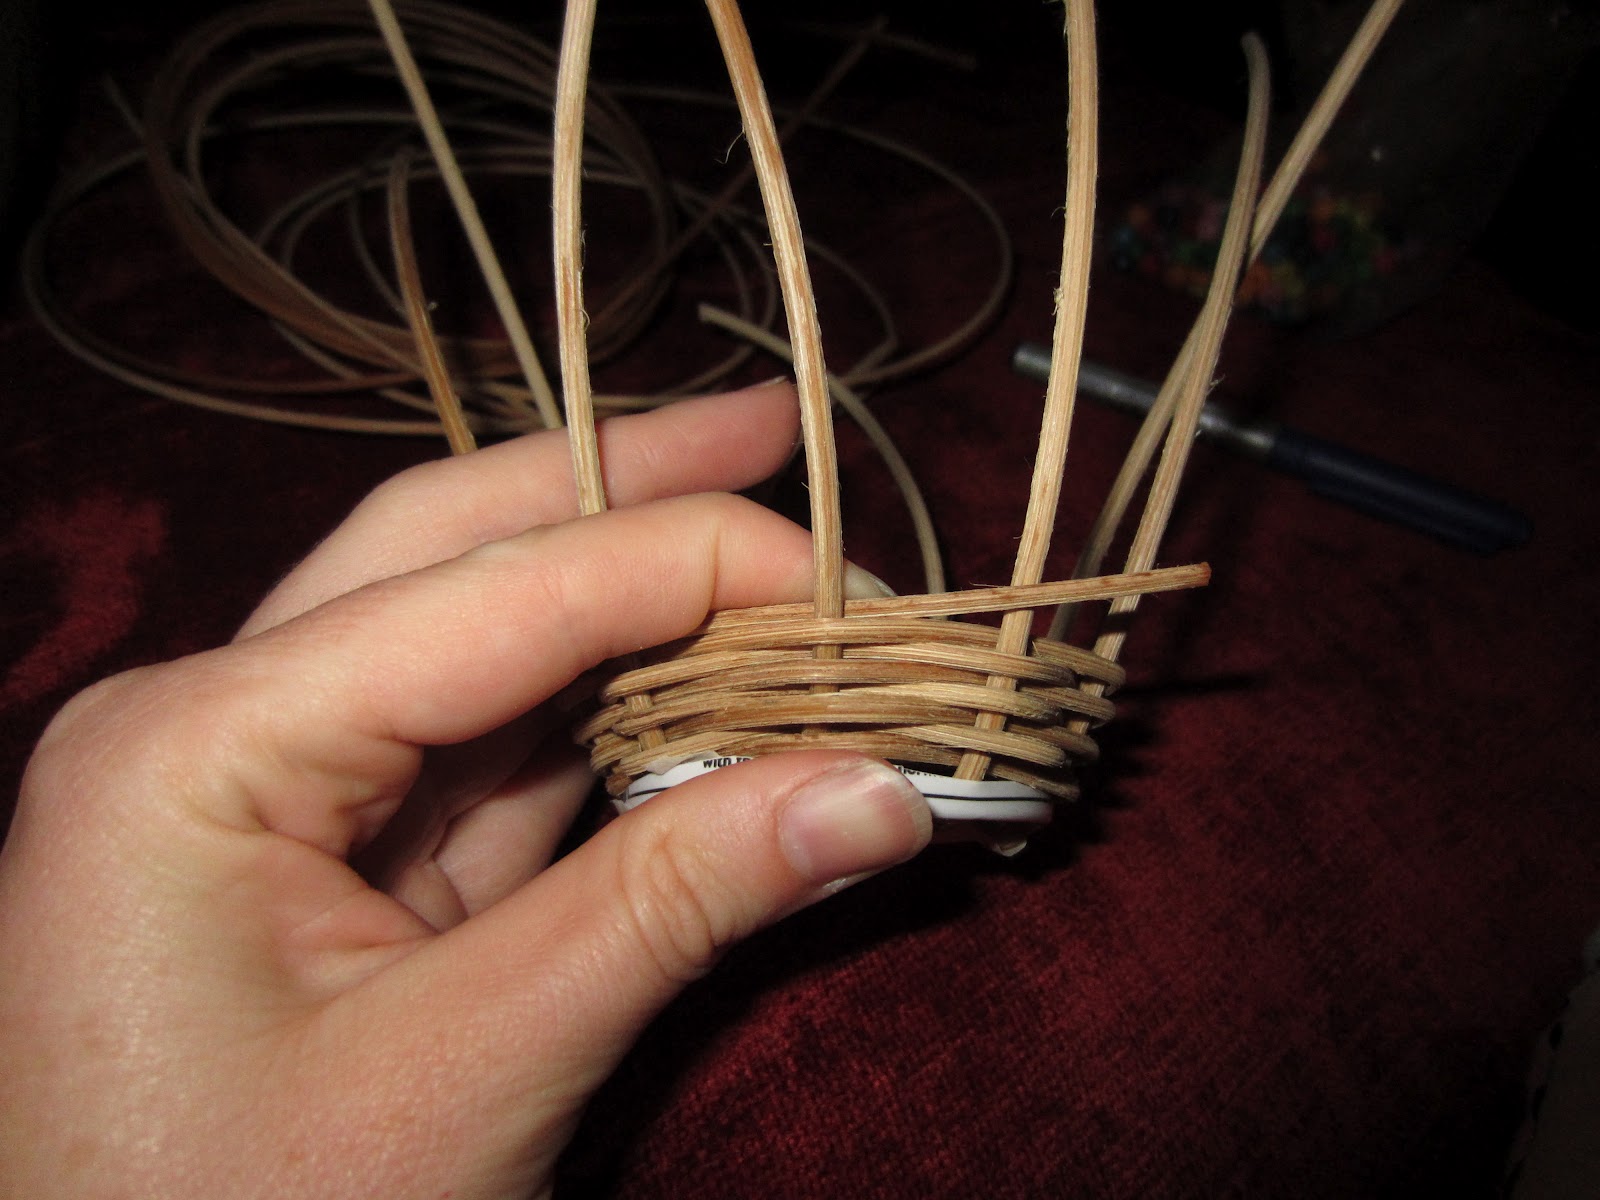
In the last post we had set up the spokes or spines for the basket and were ready to start weaving. I have the kids take a stretch of reed that is about two wing spans long for the weaving part. Make sure you keep your reed soaking in a bucket of water either at each table for the kids to grab as they need or in a central location. You have to keep the reed wet or it cracks.  I have them pull a tail and tape it down to the inside of the basket to start. Then we start going round and round over under over under.  

ok now we have reached the end of our long reed and we need to tuck the end. Have the kids leave about an inch hanging out and then have them either run the basket under the sink facet or dip it into a bucket of water for a few seconds.  Now we are going to fold and tuck the end of the reed.


If you can tuck the end UNDER you will get a cleaner looking basket.  Now is where a lot of kids get mixed up. As they put the next reed into the basket make sure they keep following the Under over pattern and really pay attention. 


If your kids are having problems with the tuck method then you can lay and overlap the ends of the reed. This leads to ends that tend to pop out more often though so I try to get them to bend and tuck.


Round and round we go. I encourage the kids to keep getting the baskets wet to make everything easier to work with and less likely to crack. At any point you can put pony beads on the spokes or spines to add a little unique touch. You can also dye the reed in Rit dye to get different colors.


Up and up we go till you have three or four inches left on the spokes/spines
Then set your basket upside down in water (I like to have a bucket of water on each table for the kids to use)
Time to finish the basket. Take each spoke and bend it over the spoke immediately to the left or right and tuck the end under the last row of weaving you did. We are making little rainbow arches.


When these are all dry you can clip the extra reed and then tada you have a fun little basket


Sunday, June 10, 2012

one session basket weaving (part 1)


Before you click away thinking this sounds too crafty, stick with me, I think your student's can gain a lot from basket weaving. Be warned this is photo heavy and I had a hard time with formatting. Because there are so many photos I am going to break this up into two posts. Part one setting up the base and "spokes" and part two the weaving and fun extras.

When I started in my current district I was bequeathed rolls and rolls of basket weaving reed and no bases. I  had never woven a basket, and really I was not planning on teaching basket weaving. I felt basket weaving was the ultimate art class cliche... underwater basket weaving and such.

Then I learned one of my 7th grade student's was 100%  blind and would NOT have an aid coming to art with him. Learning how to teach art to this young man, J, is a series of posts in itself. My goal that year was to make at least 50% of the lessons I assigned to the whole class also accessible to J. So my weaving unit was born and I decided that not only would I learn how to basket weave so that J could, but the whole class would learn.

Turns out I enjoyed basket weaving (and yes, J was quite adept at it), but also the rest of my middle school students enjoyed the process and grew as artists because of it. Yes as ARTISTS. I have learned that parts of basket weaving are messy and challenging. It is an skill that requires persistence, trial and error and patience. This is a lesson where, at some point, most of my student's want to give up but I insist they push forward and 90% of the time they ended up incredibly proud of themselves and their product.

I love going through the basket weaving process with my student's because it helps work on their patience and persistence with a tangible end result that makes parents, teachers and other students exclaim, "Wow you made that!?"

This year I went to a new school in the same district and low and behold stored away was a TON of basket weaving reed.  This is a mini one session (maybe two if your classes are shorter) starter version of basket weaving. All you need is a one or two rolls of round reed. You can order it from blick for pretty darn cheep, I think one roll of the 1/16th inch  would easily cover a class of 25. I suggest getting thinner reed as it is easier to use. I have my student's make these mini baskets before they weave larger baskets.

You need a yogurt cut, a nail, weaving read (round), scissors, a marker and beads or RIT dye if you want.

Cut the bottom off your yogurt cup make sure to keep it flipped so the "bottom" is down 

With a marker draw an odd number of dots as evenly spaced as you can...5 is the minimum and I would say 11 is the max

Use a large nail (or a hole punch) to poke a hole at each dot. Make sure the holes are not too close to the edge.

    figure out how many holes you are punching and divide it by two. Then cut that number of reeds about two feet long and one reed about one foot long. The longer reeds will basically be folded in half.

Thread the long reeds into the adjacent holes keeping the bottom of the cup still the bottom
This is what it looks like from the top
In this photo I have threaded all of the long reeds and then put the "short" read through our odd remaining hole leaving a inch or so hanging out of the bottom
and here we  have a top view...the kids say it looks like and octopus at this point
we are looking at the bottom again. I have my students use a piece of duct tape to take down the "tail " of our shorter reed and then write their name on the tape

Ok next post will be the steps to actually weaving the basket!